Dev::Log( )
Flutter - Intro to Declarative UI
12th June. 2021Table of Contents


This article is an Introduction to Declarative style of UI design using Flutter which is now being used by many companies to create cross platform applications with near native performance using just a single code base.
Flutter is a Open-Source & Multiplatform UI tookit introduced by Google in 2017. Flutter uses Dart which is a scrpting language optimised for UI development and null safety.
Imperative Model
This has been the norm for developing UI applications for a while now. Frameworks like Android and iOS use the imperative model for UI programming.
In the imperative model UI is created using manually constructed UI entities like an
ActivityorFragmentin Android or aUIViewin iOS that can later be mutated using methods and setters when the UI changes.
Hence to change a UI element a reference to it must be stored or retreived from the View's parent and any changes shall be done by calling appropirate methods on that object. Pretty straightforward, right ?
Naah, not really. The main issue with this paradigm is that you need to store a reference to each and every element that the user interacts with or that the element will change in the future when the application state changes. And not only that the developer has handle each and every possible application state and all the elements need to be updated in the right order.
Declarative Model
The problem with the imperative model leads us to the declarative model.
In the declarative model the developer has to declare the current application UI state and the framework handles the operations to transition to the new state.
This abstraction of the underlying mechanism can be leveraged to effectively create cross-platform applications.
React Native and Flutter are two prime examples.
Consider that you have to repair your car :
The Declarative model is analogous to calling your friend ( framework ) to fix up your car.
The Imperative model is like calling up your dad and he gives your step by step instructions to fix your car.
Done with the intro let's look at some code.
An Investigation
For comparison we'll build a simple Android app with a button that changes colour when clicked.
Android uses the the imperative model for porgramming its applications. View layouts are defined in XML files that is inflated into view using Kotlin / Java code and later can be manipulated by referencing their object using Ids and calling appropriate methods on it.
Using Android SDK
First we define the layout for the app.
1<!-- activity_main.xml -->23<?xml version="1.0" encoding="utf-8"?>4<androidx.constraintlayout.widget.ConstraintLayout5 xmlns:android="http://schemas.android.com/apk/res/android"6 xmlns:app="http://schemas.android.com/apk/res-auto"7 android:layout_width="match_parent"8 android:layout_height="match_parent">910 <Button11 style="@style/Widget.MaterialComponents.Button"12 android:layout_width="wrap_content"13 android:layout_height="wrap_content"14 android:padding="20dp"15 android:id="@+id/Example_Button"16 android:text="Click me!!"17 app:layout_constraintBottom_toBottomOf="parent"18 app:layout_constraintEnd_toEndOf="parent"19 app:layout_constraintStart_toStartOf="parent"20 app:layout_constraintTop_toTopOf="parent" />2122</androidx.constraintlayout.widget.ConstraintLayout>
The above code defines the button with id = Example_Button placed at the center of the screen. Now we need to inflate this layout
into view in the MainActivity class and get the Button object using the id.
1// MainActivity.kt23package com.example.examplebutton45import android.annotation.SuppressLint6import android.graphics.Color7import androidx.appcompat.app.AppCompatActivity8import android.os.Bundle9import android.widget.Button1011class MainActivity : AppCompatActivity() {12 private lateinit var exampleButton: Button // 113 private var toggleColor = false // 214 @SuppressLint("ResourceType")15 override fun onCreate(savedInstanceState: Bundle?) { // 316 super.onCreate(savedInstanceState)17 setContentView(R.layout.activity_main) // 418 exampleButton = findViewById(R.id.Example_Button) // 51920 exampleButton.setOnClickListener { // 621 toggleColor = when (toggleColor) {22 true -> {23 it.setBackgroundColor(Color.parseColor(resources.getString(R.color.nord)))24 false25 }26 else -> {27 it.setBackgroundColor(Color.parseColor(resources.getString(R.color.red)))28 true29 }30 }31 }32 }33}
You don't really need to understand the code completely but there are some key point:
Private variable
exampleButtonwill hold the reference to the button and can initialised once the View is created.Will store the state of the button, there are better ways to do this using View Models but this will do for now.
onCreate(Bundle?)is called when the View object is created.Now you inflate the previously defined layout into view.
Once the layout is inflated into view the reference to the button can be found and stored.
Set a listener on the button that is called when the button is clicked by the user.
NOTE :
The above implementation has a subtle bug and it is related to the way we are storing the application state( See point 2 ). If are running the code on your machine just toggle the button color and rotate your device.
Result
 Resulting application using the Android SDK
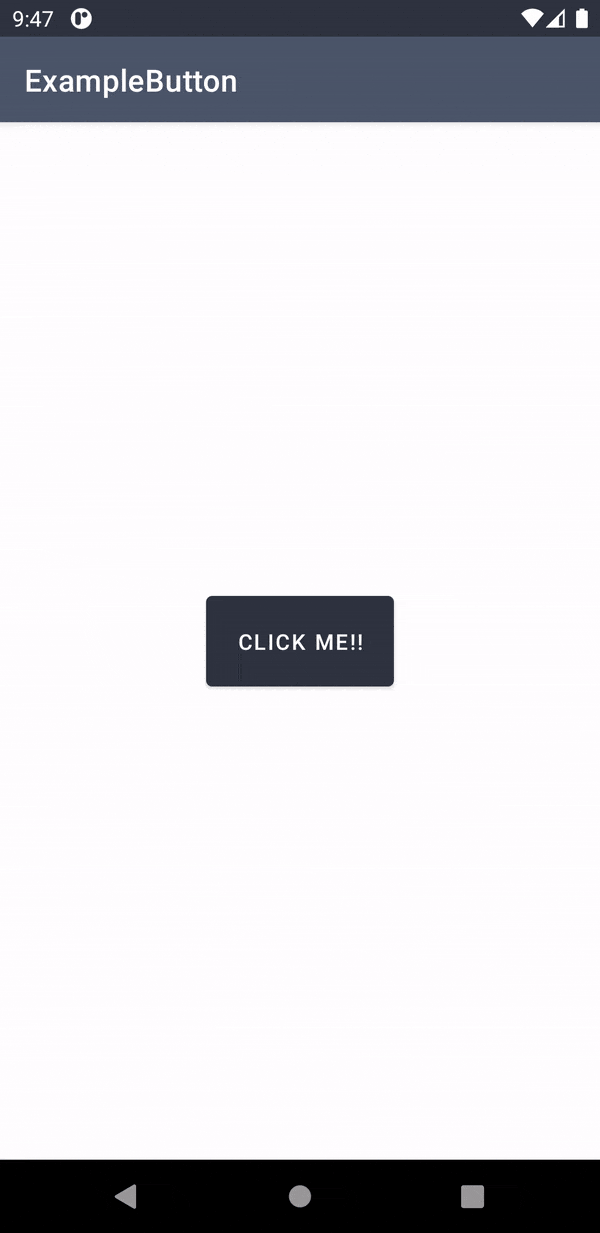
 Using Flutter SDK
Now, let's see how Flutter will handle this.
1// main.dart23import 'package:flutter/material.dart';45void main() async { // 16 runApp( // 27 MaterialApp(8 debugShowCheckedModeBanner: false,9 home: Scaffold(10 appBar: AppBar(11 title: Text("ExampleButtonFlutter"),12 backgroundColor: Color(0xFF2E3440)13 ),14 body: ExampleButton(), // 315 ),16 ),17 );18}1920class ExampleButton extends StatefulWidget { // 421 @override22 _ExampleButtonState createState() => _ExampleButtonState();23}2425class _ExampleButtonState extends State<ExampleButton> { // 526 var toggled = false;27 final nordColor = const Color(0xFF2E3440);28 final red = const Color(0xFFBF616A);2930 void _handleColorChange() { // 631 setState(() {32 toggled = !toggled;33 });34 }3536 @override37 Widget build(BuildContext context) { // 738 return Center(39 child: TextButton (40 style: TextButton.styleFrom(41 primary: Colors.white,42 backgroundColor: toggled ? red : nordColor,43 padding: EdgeInsets.symmetric(vertical: 10, horizontal: 20),44 ),45 onPressed: _handleColorChange,46 child: Text("Click Me")47 )48 );49 }50}
Again you don't need to understand the code completely, some key points:
main()is the starting point for our application and similar to main() functions in other programming languages like C++.runApp()is function that will run our Flutter application. Here it is called with aMaterialApp()object for creating an application using Google's Material Design.In the
bodyatttibute we are passing theExampleButtoncomponent or as Flutter calls it aWidget.Now we define
ExampleButtonwidget and it extends theStatefulWidgetie the widget keeps track of it state and will be updated when its state changes. The class creates a_ExampleButtonStatestate object that would keep track of the widget's state._ExampleButtonStateclass extends theStateclass and changes to class's object would trigger redrawing of theExampleButtonwidget._handleColorChange()is the private callback function that is called when the button is pressed.setState()is used to update the state and invalidate the widget which in turn triggers the redrawing.The
buildfunctions is necessary for every widget. It returns a Widget object defining how the component is to be shown. The background colour for the button is updated based on the current state.
NOTE :
Flutter treats everything as a
Widgeteven margin and padding. A widget may beStatefulWidgetie the widget maintains an internal state and can be updated or aStatelessWidgetie an immutable widget (all variable in the object need to be final).Any changes to a state must be notified to the framework (
setState) and this leads to the rebuild or redrawing of the widget.
Result
 Resulting application using the Flutter SDK
 Conclusion
As the number of UI elements in the application grows MainActivity class or any UI class in the Android SDK's Imperative Model will become more complex as
you'd need to handle every UI element each with it own activity listeners and with every interaction the UI would have to be
updated in the right order.
Whereas in the Flutter SDK all we had to do was maintain the toggled state of the button and any changes to that state would lead
to the rebuilding of the widget. Another advantage of the Flutter application is that it can be built for the Web, Android, iOS, Windows,
macOS and even Linux.
This abstraction provided by the framework can enable you to build, test and deliver applications and new features faster. This also ensures a uniform experience for all users irrespective of their platform of choice.
The simplicity of the declarative model has been a major shift in how applications are created today. Frameworks like Microsoft's .NET and Qt have introduced features to support a declarative paradigm.
The control provided by the Imperative model may be necessary in case you want something really specific like an intricate animation or a low level platform specific API. Both Flutter and React Native have support for calling platform-specific code making a major part of your application code reuseable.